How To Add Layer Mask Photoshop
Photoshop is one of the essential tools for digital artistic expression. It allows for the creation of many amazing designs. Learning how to use Photoshop is an asset for designers. It gives you access to an unlimited level of creative possibilities.
Layer mask Photoshop is another great deal on its own. It gives one of the basic, yet sophisticated functionalities of Photoshop. It is highly advantageous for every user of Photoshop to learn about layer mask Photoshop and how to use them.
What is Layer Mask Photoshop?
Before going into detailed steps on how to use layer mask Photoshop, it is vital first to understand what it is.
Layer mask Photoshop is a tool that gives extensive control over image transparency. It allows you to do extensive photo manipulations and composites. Layer mask Photoshop will enable you to mask a layer of the photo.
This mask will not erase or delete anything in the picture. Instead, it will only make the layer hidden by the cover to be transparent. Consequently, the image information in the lower layer will still reflect on the overall design.
Why add Layer Mask Photoshop?
Layer mask Photoshop allows you to include multiple pictures in one cohesive design. It will showcase every detail without the design appearing overloaded.
Likewise, using a layer mask will not affect the original pixel data of the photo. You can make use of multi-dimensional transparency without losing any detail or creating a mess of your design.
Easy Steps on How to Use Layer Mask Photoshop
Using layer mask Photoshop is not very challenging. It is even more comfortable if you are already familiar with the design of Photoshop itself. Once you have the idea of your overall plan in mind, then the rest is easy.
Below are easy steps on how to use the layer mask Photoshop efficiently.
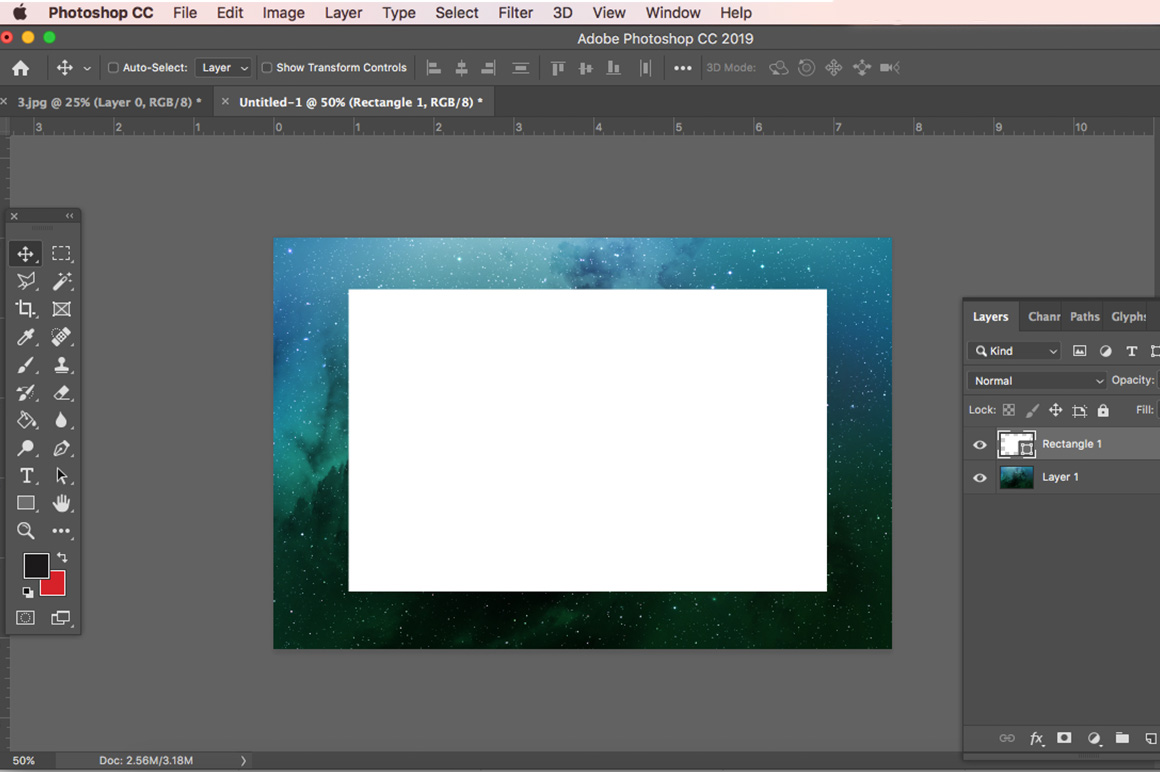
STEP 1: Choose a suitable background you want to use for your design. Now, add the new layer over the background. You can create a shape on the horizon using the shape tool.
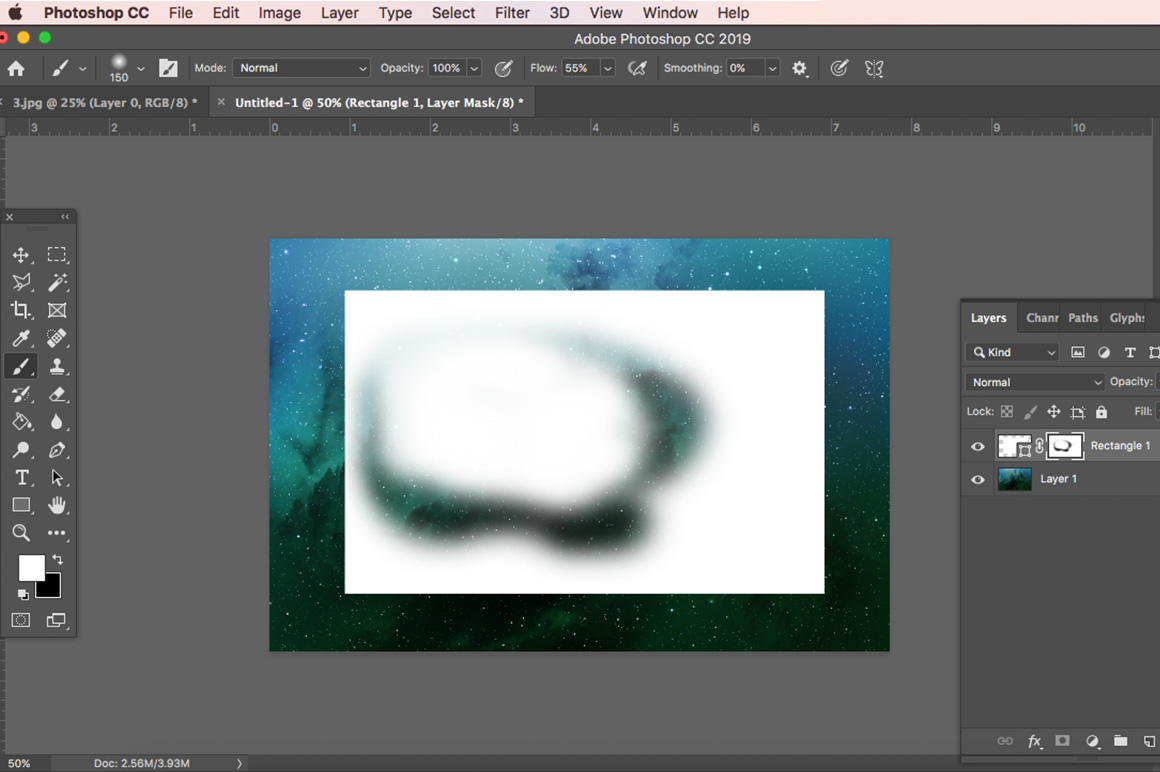
STEP 2: Once you have selected the shape you want; you can then proceed with the utilization of the layer masks. Locate the add layer mask at the base of the layer panel. The layer panel is right in the middle of the icons.
The add layer icon is a square with a circle in the middle. Once you locate the add layer mask, click on it. It will give responsive feedback by displaying a white box next to the layer icon.
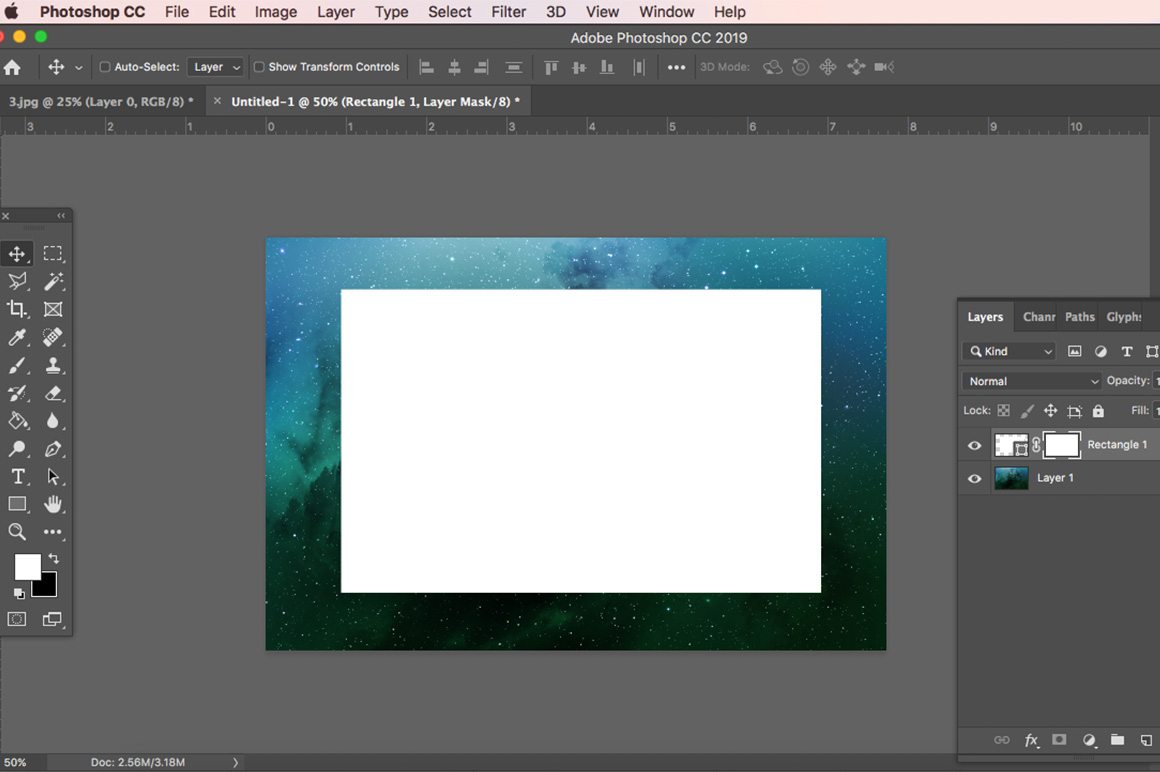
STEP 3: After this, click on the white box that appears beside the hide layer icon. This click will help you to ascertain that the layer mask is active. Once it becomes active, then you are sure that you already have your Photoshop mask.
Next, select a brush and set it to black. This selection will allow you to mask out any part of the shape.
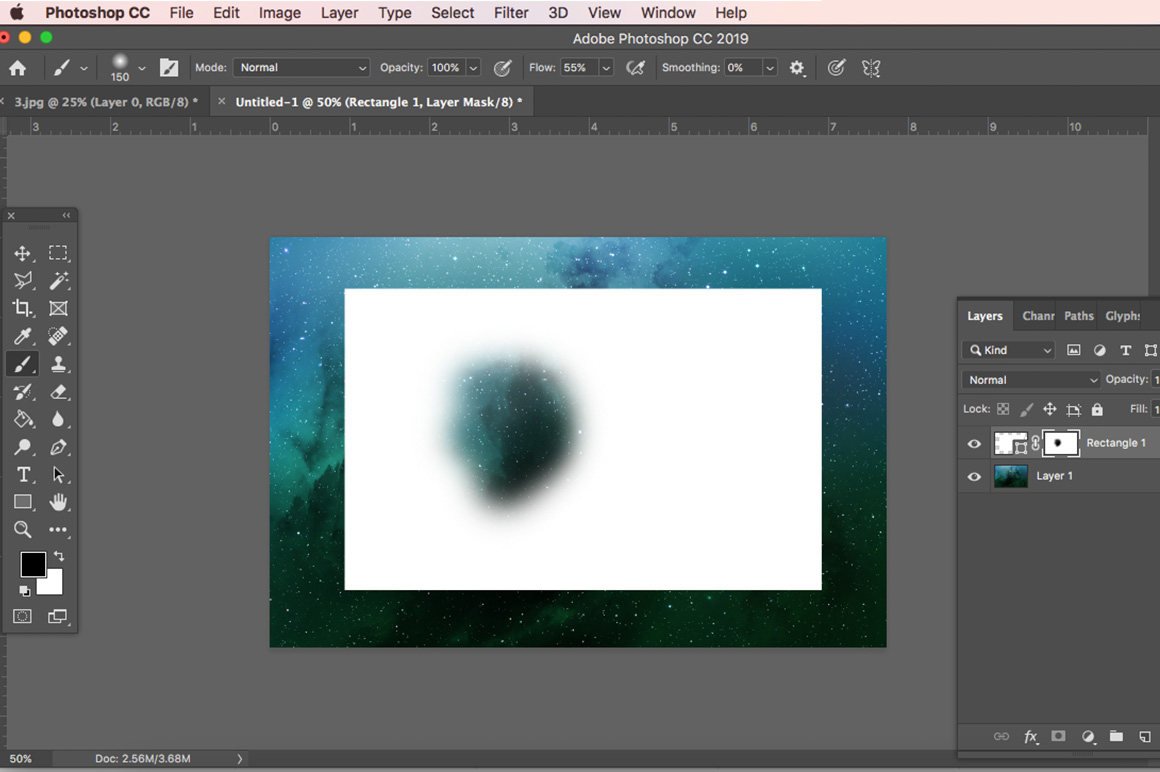
STEP 4: Since nothing has disappeared from your design, you can mask or unmask things using the color black. You can use the black to erase and then use white for recovery. Also, you can use shades of gray to wipe.
The darker the shades of gray you use, the more you get to erase whatever you want. You can use this concept of deleting and recovering to create several designs, including several dynamic shapes.
STEP 5: You can either decide to link or unlink your background or layer and the layer mask. If you connect the layer and the layer mask, it will stay attached. Thus, if you make any adjustment to the movement of the layer, the mask will remain attached and follow suit.
However, you can unlink the mask and the layer. Therefore, you can easily move the layer independently from the mask and vice versa. You can easily select the one you want to make active at any instance.
STEP 6: On a final note, you can permanently apply your layer mask Photoshop. To achieve this, right-click on the “apply layer mask”. Once you complete the application of the layer mask Photoshop, everything you mask out will permanently delete.
The layer and the mask will return to its original layer appearance. Now, you add a new layer of mask and continue with your design.
Conclusion
There you go! With the simple steps above, you can effectively use a layer mask in Photoshop. However, you should know that the results you get from the design have a lot to do with your extent of creativity. Layer mask Photoshop allows a high level of manipulation.
This layer mask allows you to explore the design of endless possibilities. You can create a single cohesive and fantastic piece of art with multiple photos. The layer mask Photoshop will allow every detail of each photo to reflect on your design. There are so many amazing photoshop bundles available on the internet that you can explore.
With layer mask Photoshop, constant practice will lead to perfection. The more you use it, the more you learn how to harness the full potential of the artistic value.
Learn more about Photoshop– a complete tutorial.
Leave a Reply